Getting started
Pre-built vs custom UI
Authsignal offers two ways of integrating:
Using Authsignal's pre-built UI. Your app redirects to a web page hosted by Authsignal (or displays it modally in an iframe). This is often the quickest way to integrate. You can still configure your own custom domain and you can heavily customize the look and feel.
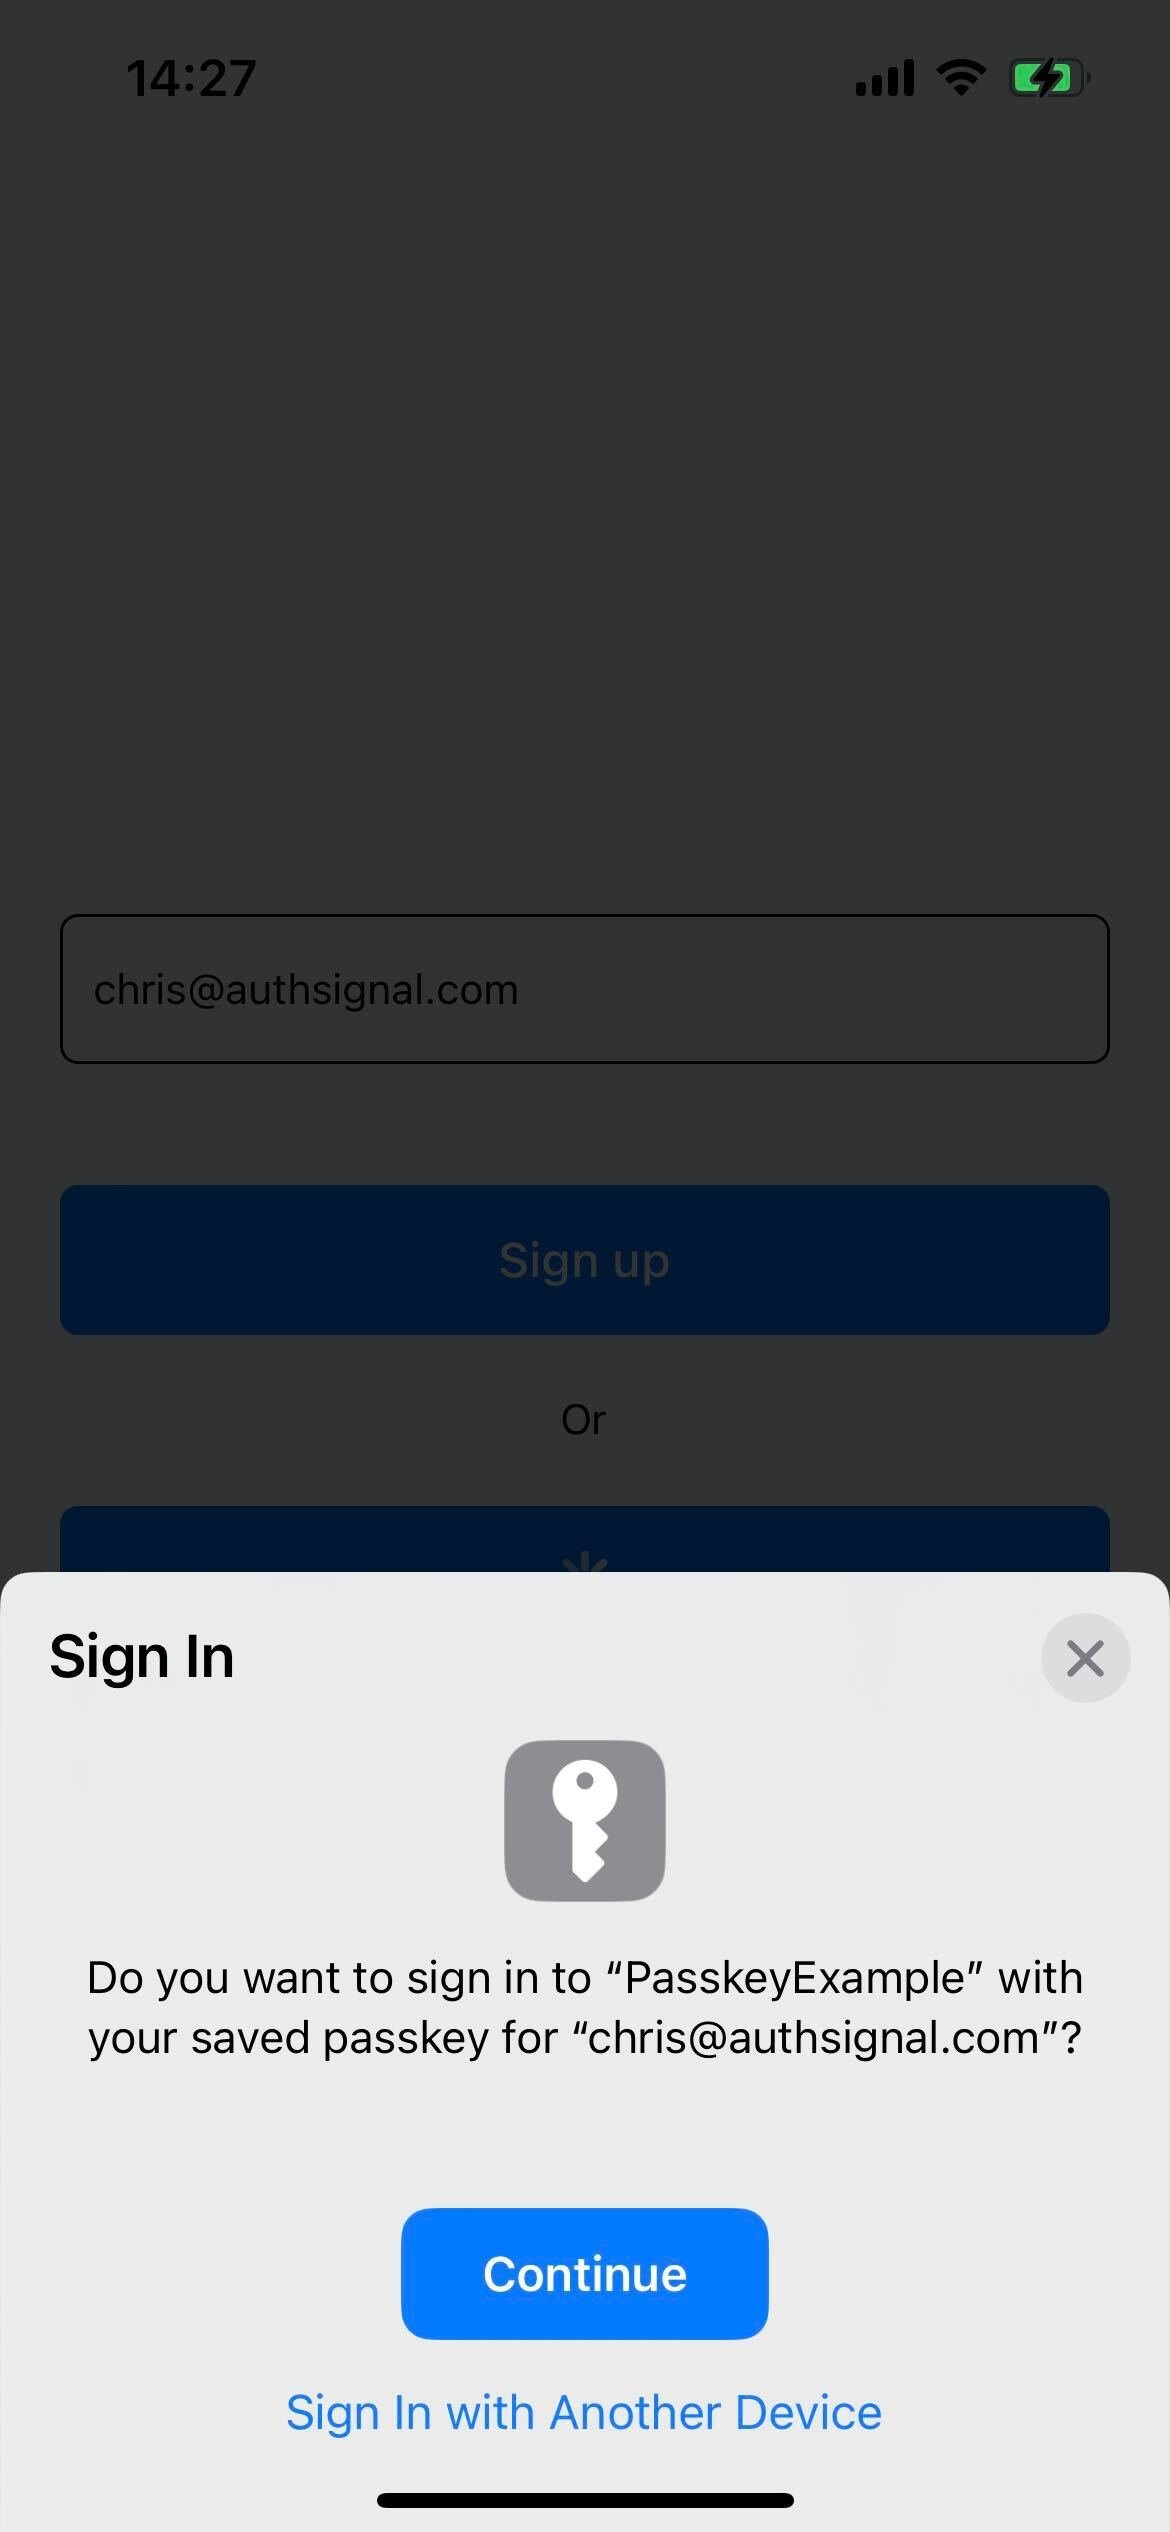
Using your own custom-built UI. You can use Authsignal's client SDKs when you want to control your own UI or when using functionality which doesn't require much custom UI (e.g. passkeys).
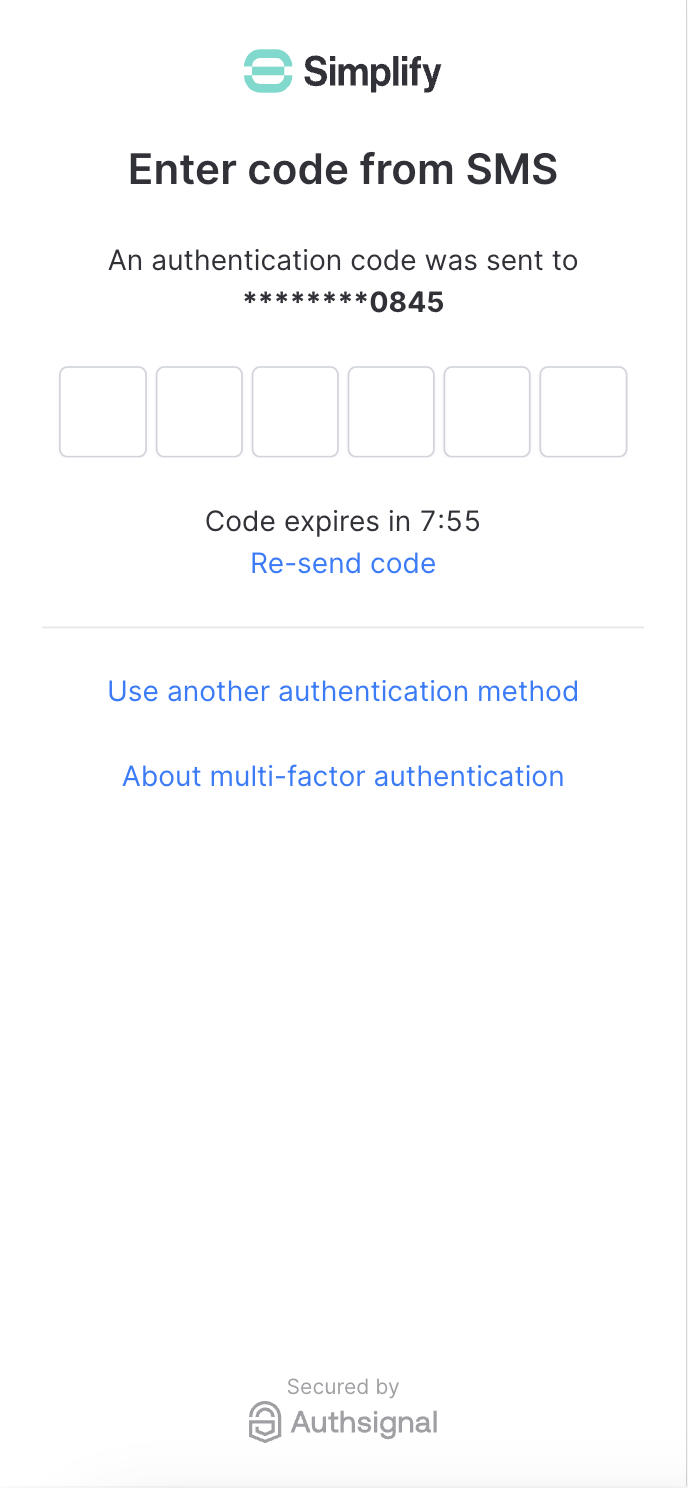
Using Authsignal's pre-built UI
1. Backend - Track an action
In your app's backend, track an action which represents what your user is doing, e.g. signIn. You can do this using one of the Authsignal Server SDKs or you can call the Authsignal Server API directly using a RESTful HTTP request.
- Node.js
- C#
- Java
- Go
- Ruby
- PHP
- Python
const result = await authsignal.track({
  userId: user.id,
  action: "signIn",
  redirectUrl: "https://yourapp.com/callback", // Only required when using Authsignal's pre-built UI
});

const url = result.url;
var request = new TrackRequest(
  UserId: user.Id,
  Action: "signIn",
  RedirectUrl: "https://yourapp.com/callback");

var response = await authsignal.Track(request);

var url = response.Url;
TrackRequest request = new TrackRequest();
request.userId = user.id;
request.action = "signIn";
request.redirectUrl = https://yourapp.com/callback";

CompletableFuture<String> url = authsignal.track(request).thenApply(response -> response.url);
response, err := authsignal.TrackAction(
  client.TrackRequest{
    UserId: user.Id,
    Action: "signIn",
    RedirectUrl: "https://yourapp.com/callback",
  },
)

url := response.Url;
result = Authsignal.track({
  user_id: user_id,
  action: "signIn",
  redirect_url: "https://yourapp.com/callback",
})

url = result[:url]
$result = Authsignal::track(
  userId: $userId,
  action: "signIn",
  payload: array("redirectUrl" => "https://yourapp.com/callback"));

$url = $result["url"]
result = authsignal_client.track(
  user_id=user_id,
  action="signIn",
  payload={"redirectUrl": "https://yourapp.com/callback"}
)

url = result["url"]
2. Frontend - Launch the pre-built UI
In your app's frontend, pass the url from the track call to the Authsignal Web SDK to launch an enrollment or re-authentication flow.
- Web
authsignal.launch(url);
3. Backend - Validate the result
Once the user has completed the challenge, Authsignal will send them back to the redirect URL you provided in step 1, appending a token as a query param which you can use to lookup the result of the challenge server-side.
- Node.js
- C#
- Java
- Go
- Ruby
- PHP
- Python
const { state } = await authsignal.validateChallenge({ token });

if (state === "CHALLENGE_SUCCEEDED") {
  // The user completed the challenge successfully
  // Proceed with authenticated action or integrate with IdP to create authenticated session
} else {
  // The user did not complete the challenge successfully
}
var request = new ValidateChallengeRequest(Token: token);

var response = await authsignal.ValidateChallenge(request);

if (response.State == UserActionState.CHALLENGE_SUCCEEDED) {
  // The user completed the challenge successfully
  // Proceed with authenticated action or integrate with IdP to create authenticated session
} else {
  // The user did not complete the challenge successfully
}
ValidateChallengeRequest request = new ValidateChallengeRequest();
request.token = token;

authsignal.validateChallenge(request).thenAccept(response -> {
  if (response.state == UserActionState.CHALLENGE_SUCCEEDED) {
    // The user completed the challenge successfully
    // Proceed with authenticated action or integrate with IdP to create authenticated session
  } else {
    // The user did not complete the challenge successfully
  }
});
response, err := authsignal.ValidateChallenge(
  client.ValidateChallengeRequest{
    Token: token,
  },
)

if err == nil && response.State == "CHALLENGE_SUCCEEDED" {
  // The user completed the challenge successfully
  // Proceed with authenticated action or integrate with IdP to create authenticated session
} else {
  // The user did not complete the challenge successfully
}
response = Authsignal.validate_challenge(token: token)

if response[:state] == "CHALLENGE_SUCCEEDED"
  # The user completed the challenge successfully
  # Proceed with authenticated action or integrate with IdP to create authenticated session
else
  # The user did not complete the challenge successfully
end
$result = Authsignal::validateChallenge(token: $token);

if ($result["success"]) {
  # The user completed the challenge successfully
  # Proceed with authenticated action or integrate with IdP to create authenticated session
}
result = client.validate_challenge(token=token)

if result["state"] == "CHALLENGE_SUCCEEDED":
  # The user completed the challenge successfully
  # Proceed with authenticated action or integrate with IdP to create authenticated session
Using your own custom-built UI
1. Backend - Track an action
In your app's backend, track an action which represents what your user is doing, e.g. signIn. You can do this using one of the Authsignal Server SDKs or you can call the Authsignal Server API directly using a RESTful HTTP request.
- Node.js
- C#
- Java
- Go
- Ruby
- PHP
- Python
const result = await authsignal.track({
  userId: user.id,
  action: "signIn",
});

const token = result.token;
var request = new TrackRequest(UserId: user.Id, Action: "signIn");

var response = await authsignal.Track(request);

var token = response.Token;
TrackRequest request = new TrackRequest();
request.userId = userId;
request.action = action;

CompletableFuture<String> token = authsignal.track(request).thenApply(response -> response.token);
response, err := authsignal.TrackAction(
  client.TrackRequest{UserId: user.Id, Action: "signIn"},
)

token := response.Token;
result = Authsignal.track({
  user_id: user_id,
  action: "signIn",
})

token = result[:token]
$result = Authsignal::track(userId: $userId, action: "signIn");

$token = $result["token"]
result = authsignal_client.track_action(
  user_id=user_id,
  action="signIn"
)

token = result["token"]
2. Frontend - Use a client SDK
Use one of the Authsignal Client SDKs to perform a challenge directly within your app, passing the token from step 1.
3. Backend - Validate the result
Pass the result token returned by the client SDK to your backend and validate the result of the challenge server-side.
- Node.js
- C#
- Java
- Go
- Ruby
- PHP
- Python
const { state } = await authsignal.validateChallenge({ token });

if (state === "CHALLENGE_SUCCEEDED") {
  // The user completed the challenge successfully
  // Proceed with authenticated action or integrate with IdP to create authenticated session
} else {
  // The user did not complete the challenge successfully
}
var request = new ValidateChallengeRequest(Token: token);

var response = await authsignal.ValidateChallenge(request);

if (response.State == UserActionState.CHALLENGE_SUCCEEDED) {
  // The user completed the challenge successfully
  // Proceed with authenticated action or integrate with IdP to create authenticated session
} else {
  // The user did not complete the challenge successfully
}
ValidateChallengeRequest request = new ValidateChallengeRequest();
request.token = token;

authsignal.validateChallenge(request).thenAccept(response -> {
  if (response.state == UserActionState.CHALLENGE_SUCCEEDED) {
    // The user completed the challenge successfully
    // Proceed with authenticated action or integrate with IdP to create authenticated session
  } else {
    // The user did not complete the challenge successfully
  }
});
response, err := authsignal.ValidateChallenge(
  client.ValidateChallengeRequest{
    Token: token,
  },
)

if err == nil && response.State == "CHALLENGE_SUCCEEDED" {
  // The user completed the challenge successfully
  // Proceed with authenticated action or integrate with IdP to create authenticated session
} else {
  // The user did not complete the challenge successfully
}
response = Authsignal.validate_challenge(token: token)

if response[:state] == "CHALLENGE_SUCCEEDED"
  # The user completed the challenge successfully
  # Proceed with authenticated action or integrate with IdP to create authenticated session
else
  # The user did not complete the challenge successfully
end
$result = Authsignal::validateChallenge(token: $token);

if ($result["success"]) {
  # The user completed the challenge successfully
  # Proceed with authenticated action or integrate with IdP to create authenticated session
}
result = client.validate_challenge(token=token)

if result["state"] == "CHALLENGE_SUCCEEDED":
  # The user completed the challenge successfully
  # Proceed with authenticated action or integrate with IdP to create authenticated session