Creating rules
In the previous section we tracked and configured an action that challenged our users on sign-in. However, we have decided that challenging our users on every sign-in is not the best user experience.
In this guide we will learn how to use Authsignal's rules engine to only challenge our users in a high-risk scenario.
1. Creating our rule
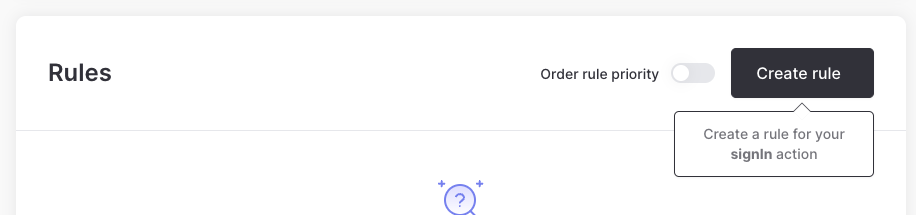
The first step is to head back to the Rules section of our signIn action. We then want to
click the Create Rule button.
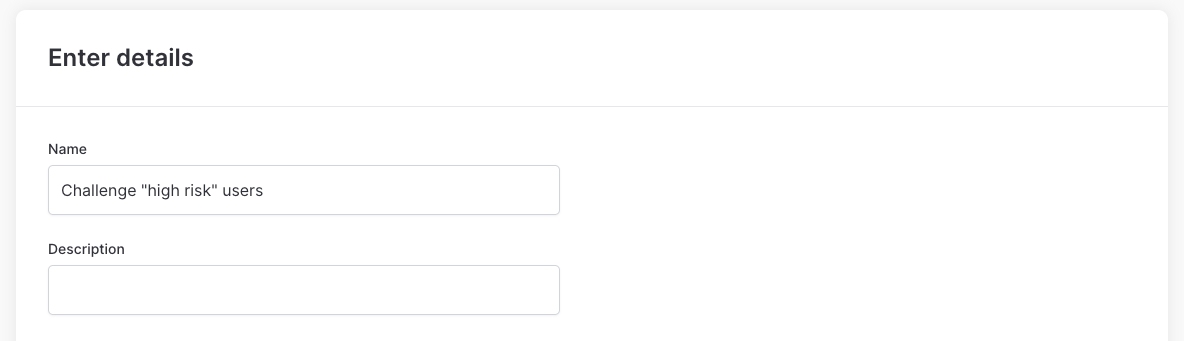
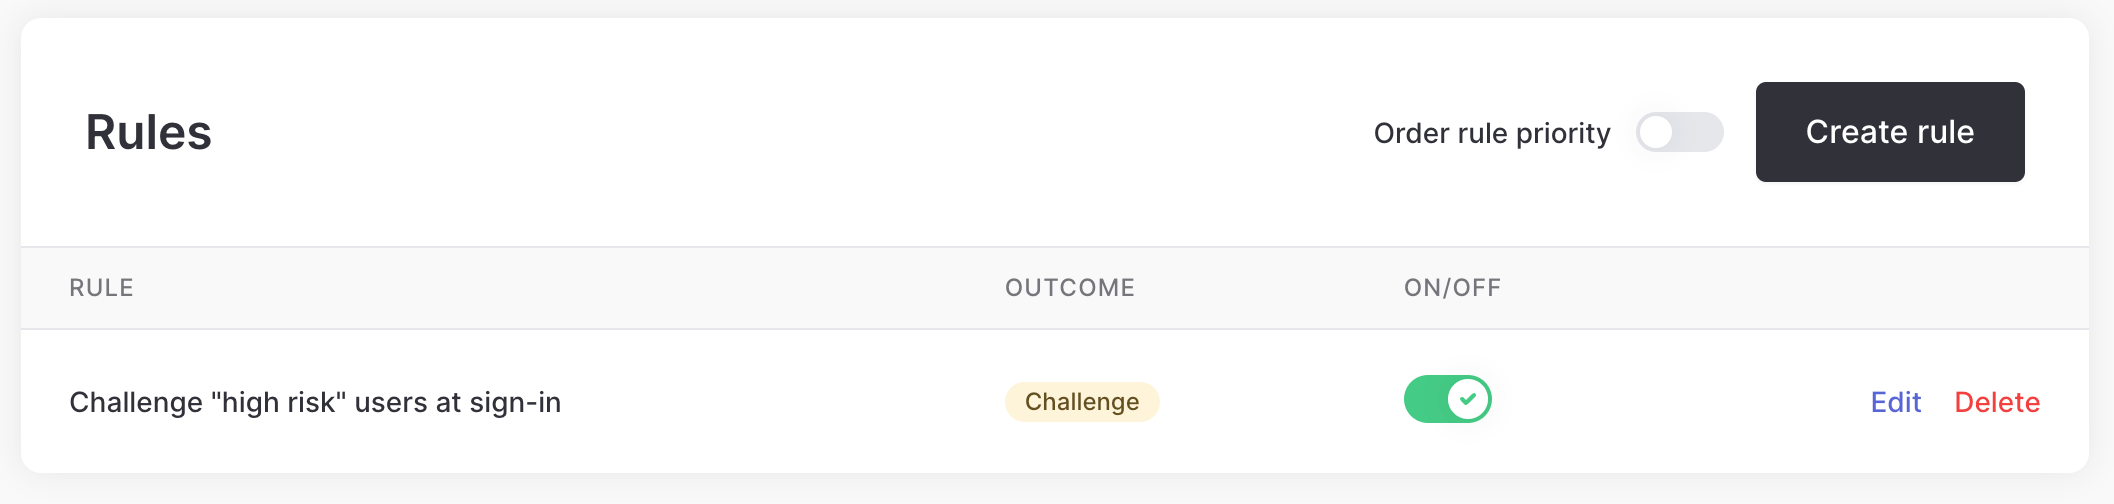
Enter a name for your rule, for example Challenge "high-risk" users. Then optionally provide a description.
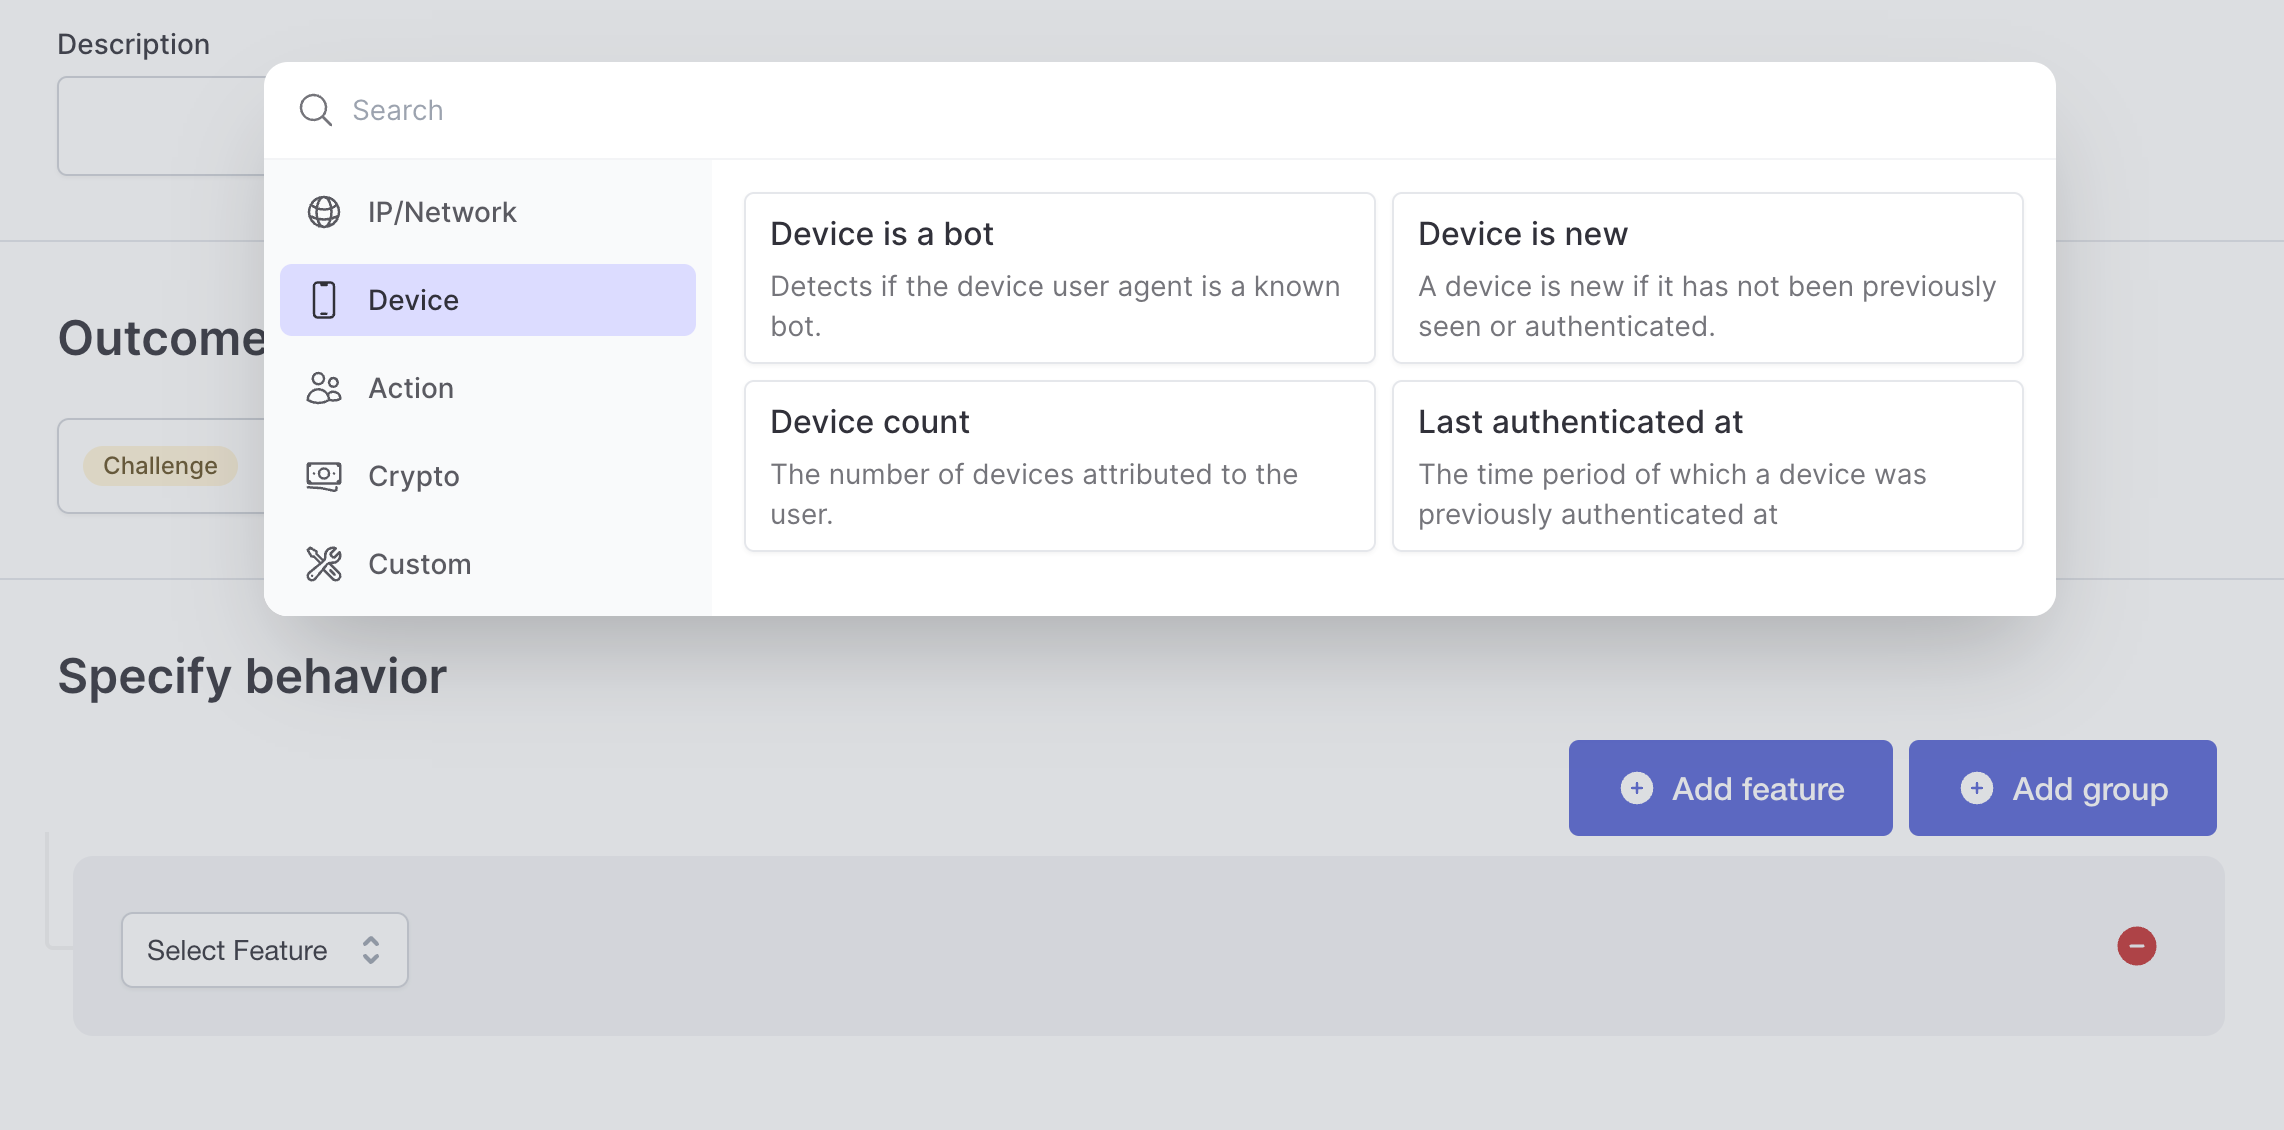
Next, set the outcome to Challenge. This means that if the rule is triggered, the default action outcome will be overridden, and the user will be challenged.

Now it is time to define the rules behavior. We will determine a user as 'high-risk' if they meet any of the following conditions:
- Are detected as being a bot
- Are on a new device
- Are using an anonymous IP address
To add these conditions, click Add feature below and click on Select feature. Choose the Device category and select the Device is new feature. Repeat this process for the Device is a bot feature (in the Device category) and for the IP is anonymous feature (in the IP/Network category).
Now change the conjunction logic from AND to OR so that the rule will be triggered if any of the conditions are met.
You should now see three conditions for your new rule.
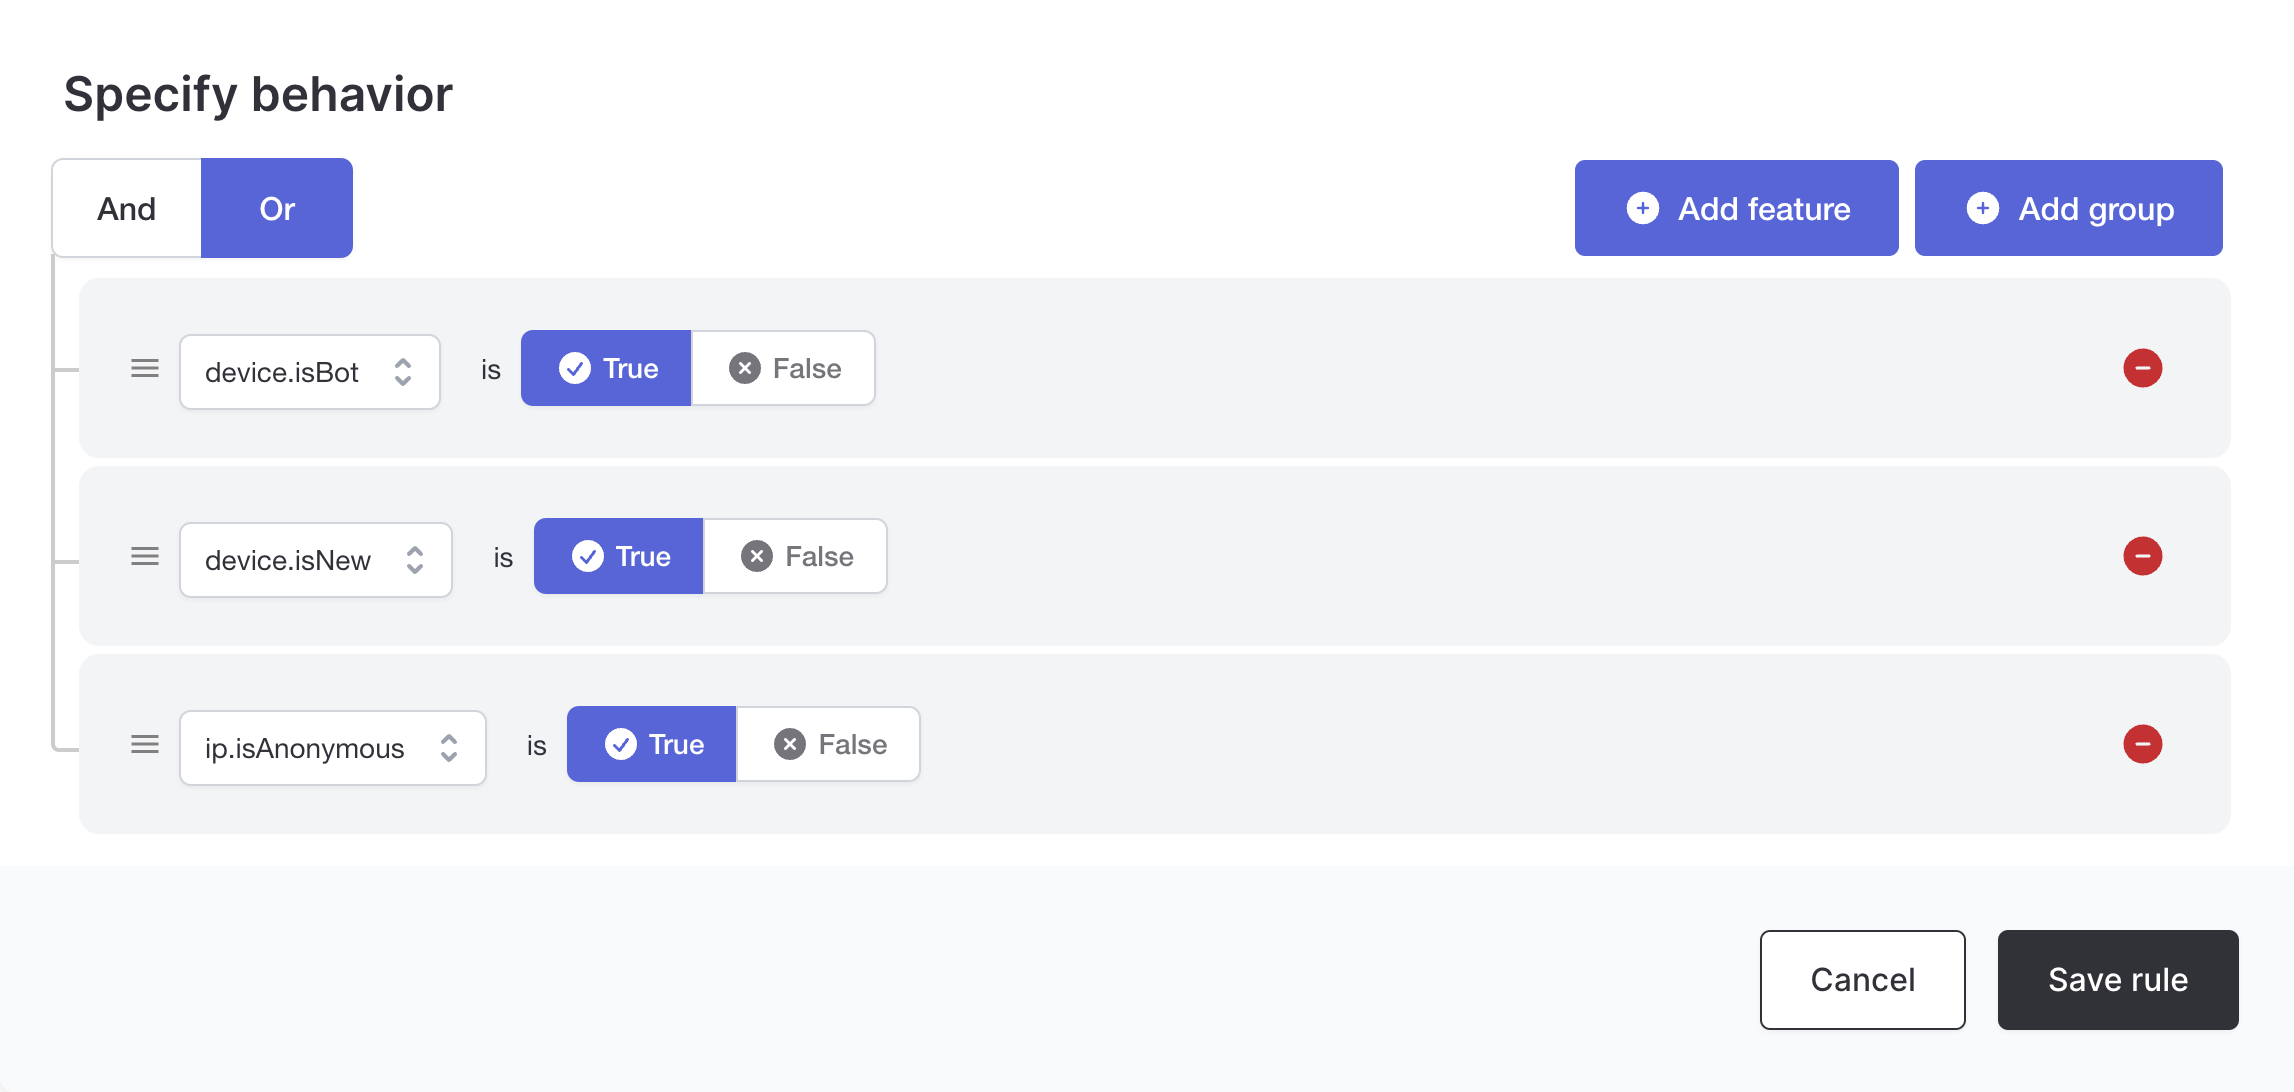
At the bottom of the page click Save rule. You will be returned to the Rules page where the rule you just created will appear.
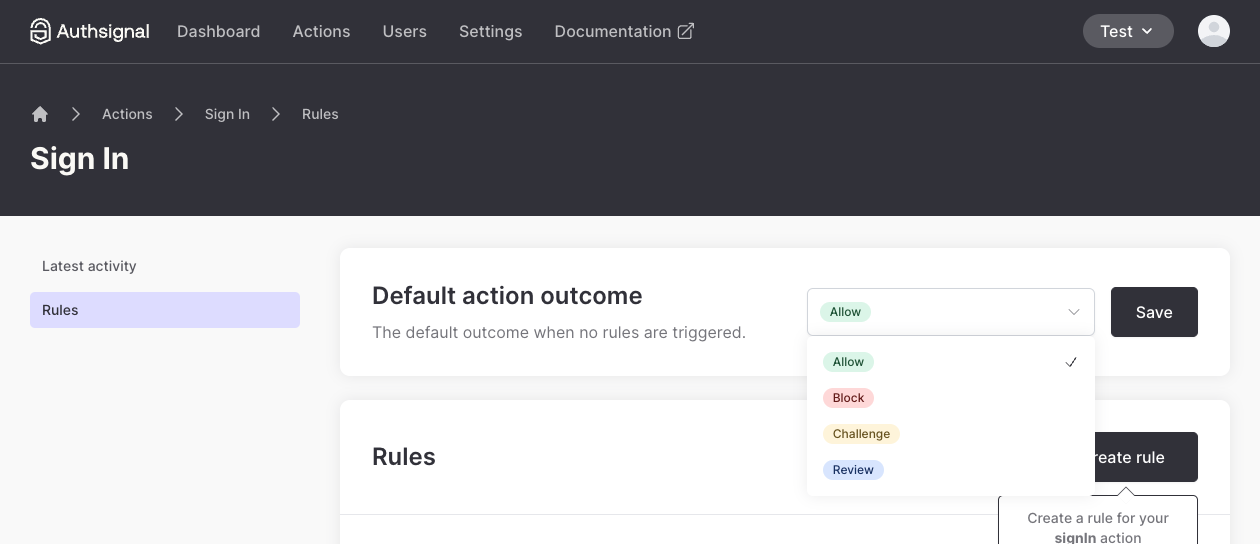
Finally, change the default outcome of the signIn action to ALLOW and click Save. This means that if a user does not trigger our
newly created Challenge "high-risk" users rule, they will be allowed to proceed without a challenge.
2. Updating our track action calls
Now that we have created our rule, we need to update our track action call to include some additional fields: deviceId, ipAddress
, and userAgent.
You can use our Web SDK to easily grab the anonymousId that can be used as the deviceId field.
- Node.js
import requestIp from "request-ip";

const result = await authsignal.track({
  action: "signIn",
  userId: "usr_123",
  deviceId: req.body.deviceId, // `deviceId` sent from the client
  userAgent: req.headers["user-agent"],
  ipAddress: requestIp.getClientIp(req) ?? undefined,
});
3. Testing our rule
Now that we have updated our track action call, let's verify everything is working as expected. For convenience, Authsignal provides
a Track a test action feature that we can use to test our rules.
Go to the Latest activity section of the signIn action and you should see a Track a test action button.

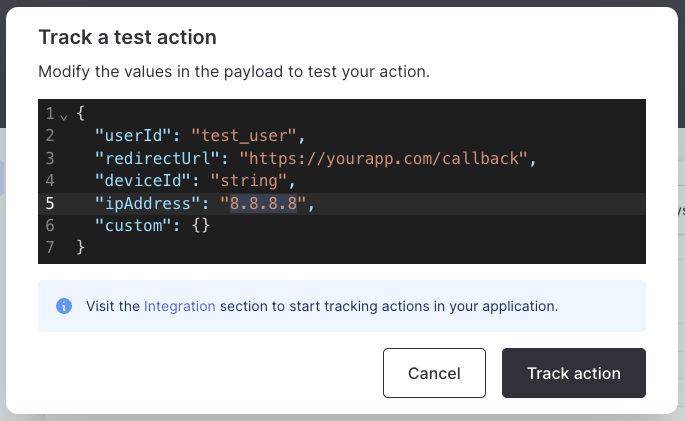
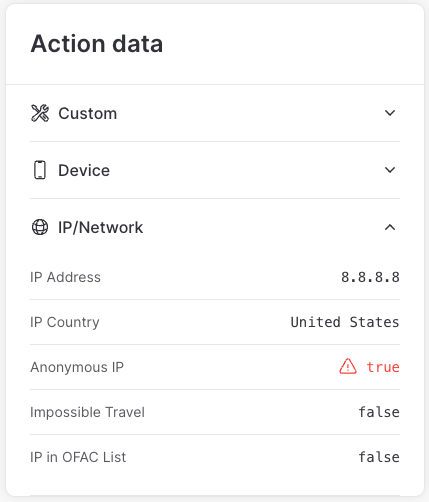
Click the Track a test action button and a dialog will pop up where we can provide some test data. Let's change the userId to test_user and ipAddress to
a known anonymous IP address, for example 8.8.8.8.
Finally, click Track action and you will see a breakdown of the action response.
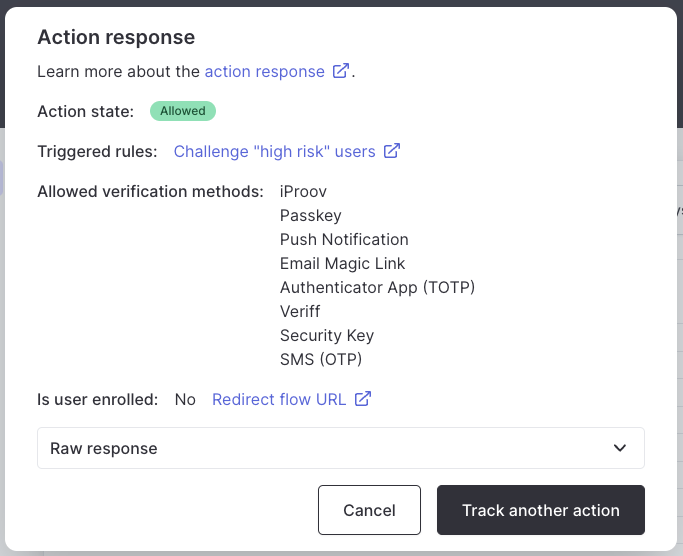
Interestingly, despite our "Challenge "high-risk" users" rule being triggered, the action state is Allowed.
The outcome of our rule was ignored because the user test_user is not enrolled (they have no enrolled authenticators). Authsignal will only
challenge users that have at least one authenticator enrolled.
As the user is not enrolled, the url will instead take a user to the authenticator enrollment flow.
Let's enroll the user we used in our test action by clicking the Redirect flow URL link and adding an authenticator. For more information, see our guide on enrolling users.
Now, track another test action with the data we used previously. This time you should see that the action state is Challenge required.
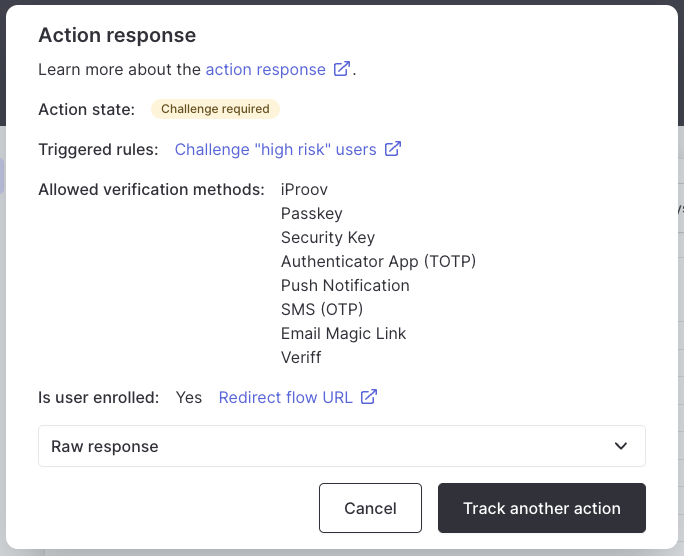
Our rule is now behaving as expected and our test user has been challenged because they are using an anonymous IP address.
Next steps
In this guide we have learned how to create a rule that will challenge our users in a high-risk scenario. Our rule utilized some of Authsignal's predefined features like bot detection, device detection, and IP address detection. However, you may find that your rule logic requires your own set of data points. In the next guide we will learn how to create our own custom features.