Using custom data
In the previous section we learned how to create a rule for our signIn action that utilized
some of Authsignal's predefined features like bot detection, device detection, and IP address detection.
In this guide we will explore how we can create our own custom data points within the rules builder. With these custom data points, we will create a rule that will challenge a user when they attempt to withdraw funds over a certain amount.
1. Configure the withdrawFunds action
Let's create our withdrawFunds action and head to the Rules section. If you need a refresher on how to create/configure an action, check out our guide on
configuring your action.
Click the Add rule button and name your rule Challenge large withdrawals, optionally provide a description, and set the
Outcome to Challenge.

2. Create our custom data point
In the Specify behavior section, click the Add feature button and then click Select feature. The feature dialog will open, click on the Custom tab.
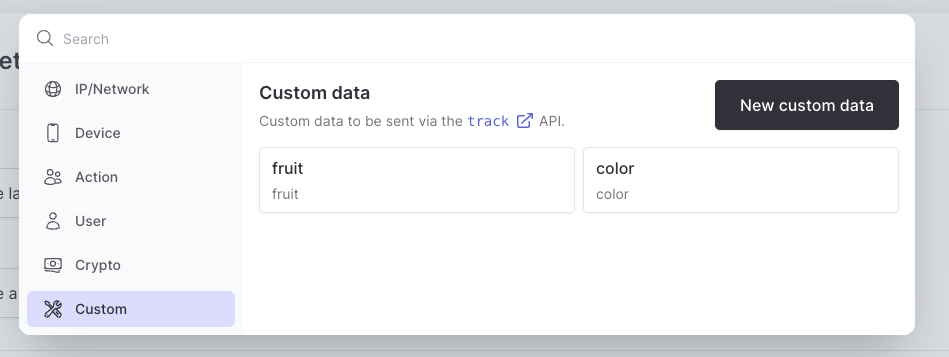
Click the New custom data button and fill in the form with the values as per the below image.

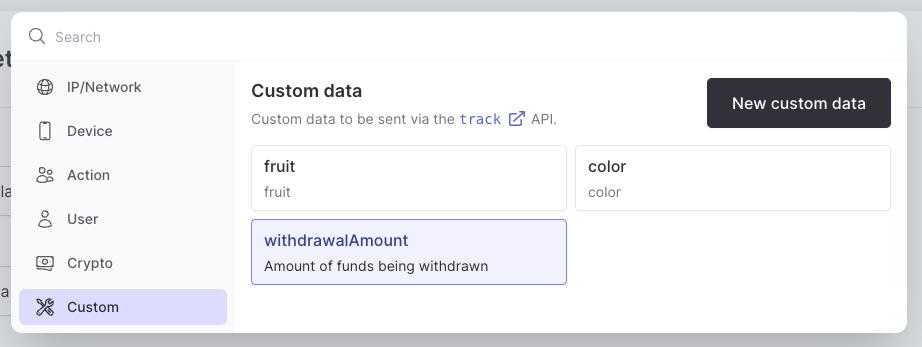
The value you provide to the Name field dictates how it must be sent in the track action payload.
We have given our withdrawalAmount field a Type of Number as we will be sending the amount as a number in the track action payload. The Type
field affects what operations you can perform on the custom data point in the rules builder.
Click Add custom data to save your custom data point. It will be now listed a selectable feature in the Custom tab along with any other custom data points you have created. For ease of use we make any custom data points you create available across all of your actions.
Now select your newly created withdrawalAmount custom data point. You should now see a new condition added to your rule. Let's
change the operation from == to > and set the value to 2000.
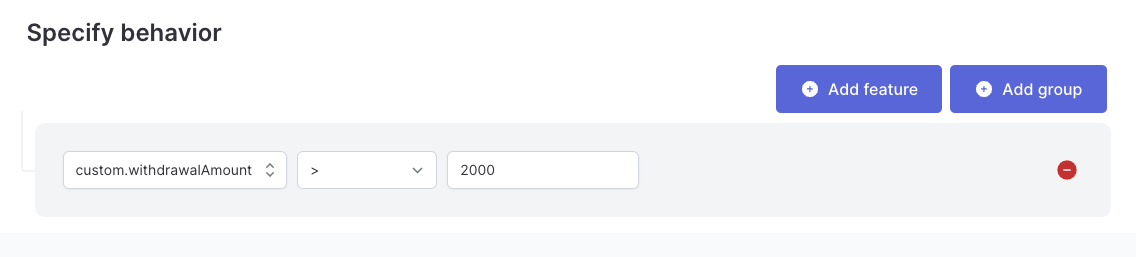
If you are not seeing the correct operations for your custom data point, you may have not set the Type to Number when you created it.
Finally, click the Save button and you should see your rule listed in the Rules section.

3. Adding custom data to the track action payload
Now that we have created our rule, we need to send the withdrawalAmount custom data point in the track action payload. When tracking actions
Authsignal allows you to send a custom object that contains any of your custom data points. For our withdrawFunds action this will look like:
- Node.js
const result = await authsignal.track({
  action: "withdrawFunds",
  userId: "test_user",
  redirectUrl: "https://example.com/callback",
  custom: {
    withdrawalAmount: 2001,
  },
});
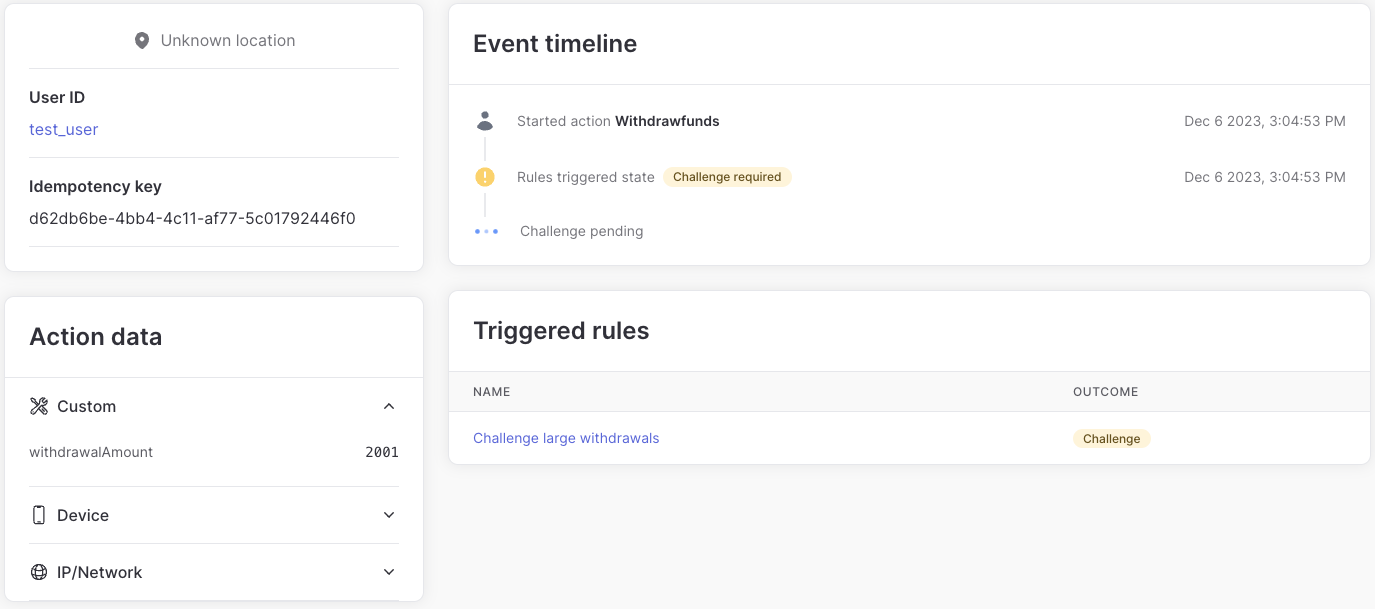
Once you have tracked some actions with your custom data, go to the Latest activity table and click the View details link on one of your actions. Here we can verify if our rule was triggered and if our custom data was sent correctly.
In the below images you can see the Challenge large withdrawals rule was triggered and resulted in a challenge. In the Action data section, you see
that our withdrawalAmount custom data point was sent with a value of 2001.
Finishing up
In this guide we learned how to create a custom data point and use it in a rule. Custom data points are a powerful feature that allow you to create rules that are specific to your business. If you have any questions or feedback about custom data points, please get in touch.